10 Easy Windows 10 Multitasking Tips and Tricks Every User Should Know
by islam ahmed


multitasking is a big part of our digital lives, in fact, our lives in general. Doing various tasks at once can improve our productivity and gets things done faster. So, whatever be the operating system, you should be aware of the multitasking features it offers to its users and eases their everyday experience.
When we are talking about Windows 10, you can feel happy that there are a plethora of Windows 10 multitasking tips and tricks to improve your productivity. People tend to discover them now and then.
These multitasking features in Windows 10 range from simple Windows keyboard shortcuts and all the way to modern virtual desktop experiences. In this post, I would like to tell you some Windows 10 multitasking tips and tricks which I have known.
Windows 10 Multitasking – 10 Easy tips and tricks
1. Use Windows touchpad gestures – 11 ways to use your fingers
One thing I like a lot in Apple MacBooks is the variety of touchpad gestures offered by macOS. Microsoft has also started offering touchpad gestures other than pinch-to-zoom and two finger scroll. You might have heard about Precision Touchpads which the company has been promoting for a while.
On Windows 10, you can take advantage of the following touchpad gestures for multitasking:
| Gesture | Description |
|---|---|
| Single tap | Select an item or open link. |
| Two-finger tap | Open context menu (right-click). |
| Two-finger vertical scroll | Move up or down in web pages, apps, and Files Explorer. |
| Two-finger horizontal scroll | Move right or left in web pages, apps, and File Explorer. |
| Two-finger pinch | Make a pinching gesture to zoom in and zoom out. |
| Three-finger horizontal swipe | Switch between active apps. |
| Three-finger vertical swipe up | Opens Task View to see open apps. |
| Three-finger vertical swipe down | Show desktop. Swipe up again to hide the desktop. In other words, it can be used to minimize or maximize apps. |
| Three-finger tap | Open Cortana in listening mode. |
| Four-finger horizontal swipe | Switch between virtual desktops. |
| Four-finger tap | Opens Action Center. |
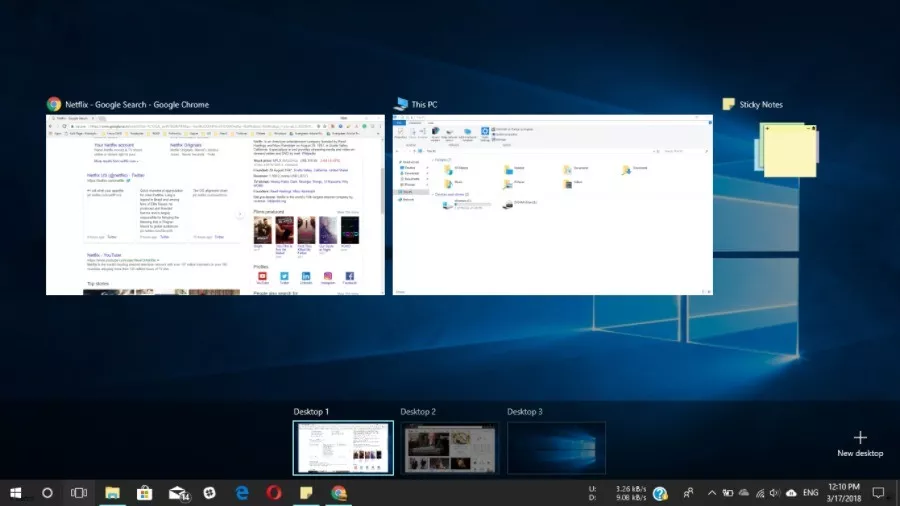
2. Use virtual desktop
People who have to deal with a lot of open apps can take advantage of the virtual desktop feature in Windows 10. You can unclutter the taskbar on the desktop and organize open apps across multiple desktops according to your needs.
You can access the Virtual Desktop interface by clicking the Task View button in the Windows 10 Taskbar (next to Cortana). You can click Add Desktop in the bottom right corner to a new virtual desktop.
As mentioned above, switching between virtual desktops in Windows 10 is as simple as a four-finger swipe. Swipe up with three fingers to see the Task View screen where you can close apps and delete virtual desktops. You can also move apps between virtual desktops by dragging them.
Here are some virtual desktop keyboard shortcuts:
| Keyboard Shortcut | Description |
|---|---|
| Windows + Tab | Open Task View to manage virtual desktops. |
| Windows + CTRL + D | Add a new virtual desktop. |
| Windows + CTRL + Right (or Left) | Switch between virtual desktops. |
| Windows + Ctrl + F4 | Close an active virtual desktop. |
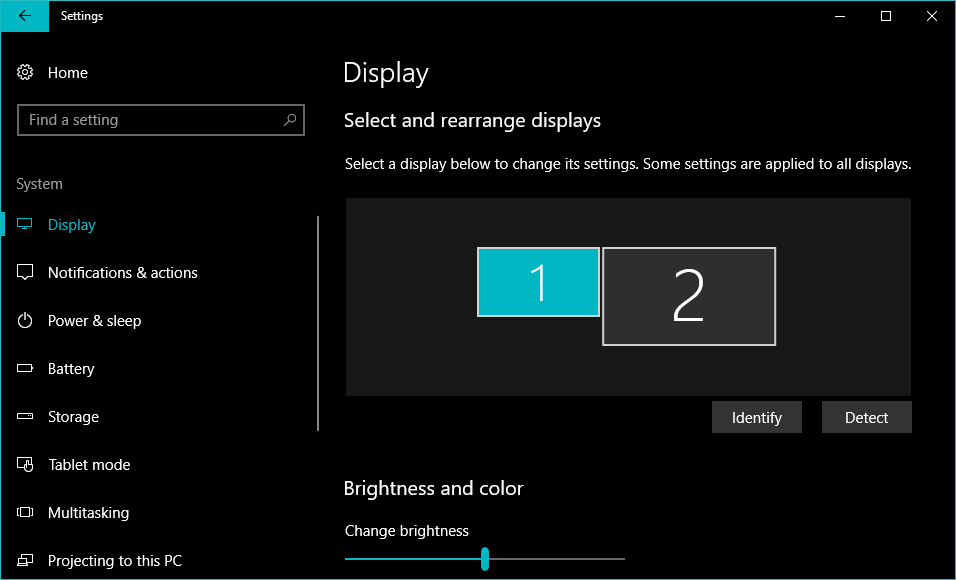
3. Use an extra monitor with your PC
Adding a second monitor to your computer can increase your productivity a lot, there is no doubt about that. With the aid of the HDMI or some other interface, most external monitors come with plug-and-play support. You can use the second monitor as an extension of your primary screen or duplicate your desktop to see things on a bigger screen.
When connected to a second screen, use the Windows + P keyboard shortcut to change the display mode. Various options to manage multiple screens in Windows 10 are present in Settings > System > Display. There you can choose which display you want to keep as primary, change screen resolution, and other things.
4. Shake shake minimize
One good thing to add to your Windows 10 multitasking tips and tricks arsenal is this simple trick. If you want to minimize all the apps except one, click and hold the title bar of that app and shake it. Do the same to maximize the apps.
5. Mouse-powered Windows 10 multitasking
A couple of settings associated with the mouse and keyboard can improve your Windows 10 multitasking experience. Go to Settings > Devices > Mouse.
There, turn on the toggle that says “Scroll inactive windows when I hover over them.” it saves time when you work with multiple windows at the same time as you don’t have to click it to enable scrolling.
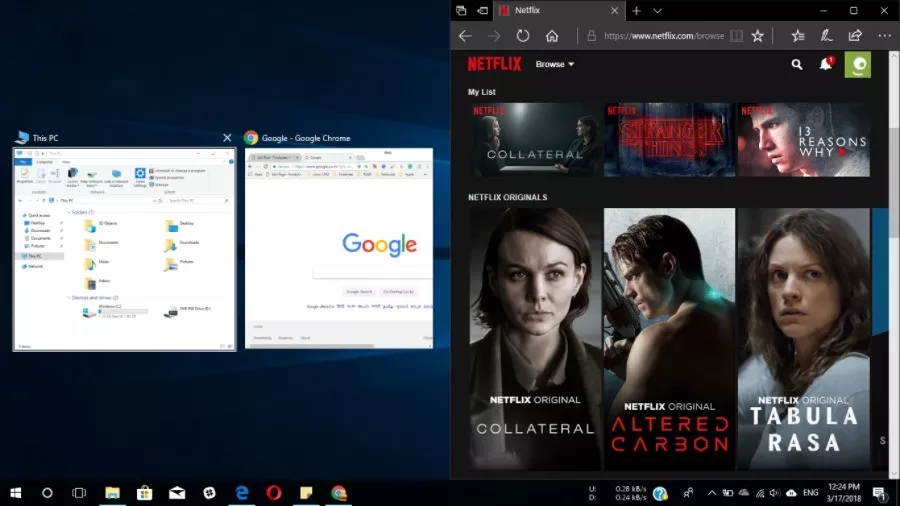
6. Oh! Snap – Windows 10 split screen
Snapping apps in Windows 10 is like a daily routine for multitaskers. There many ways in which you can snap a window.
Hold an app window by its title bar and drag it to the right or left edge of the screen. The app will resize to cover half of the screen area. Next, the Snap Assist feature suggests the active apps to fill the rest of the screen.
You can also drag window to one of the corners, so it covers a quarter of the screen area. This allows you to work with up to four apps on your screen. You might face some inconvenience when snapping apps on a dual monitor setup because the two displays share a common edge.
Various options related to snapping windows can be found in Settings > System > Multitasking.
7. Snap windows using the keyboard
You can also take the help of the keyboard to snap Windows according to your needs. Use the keyboard shortcut Windows + Right Arrow to snap a window to the right and Windows + Left Arrow to snap a window to the left. Try various arrow key combinations to explore more snaps.
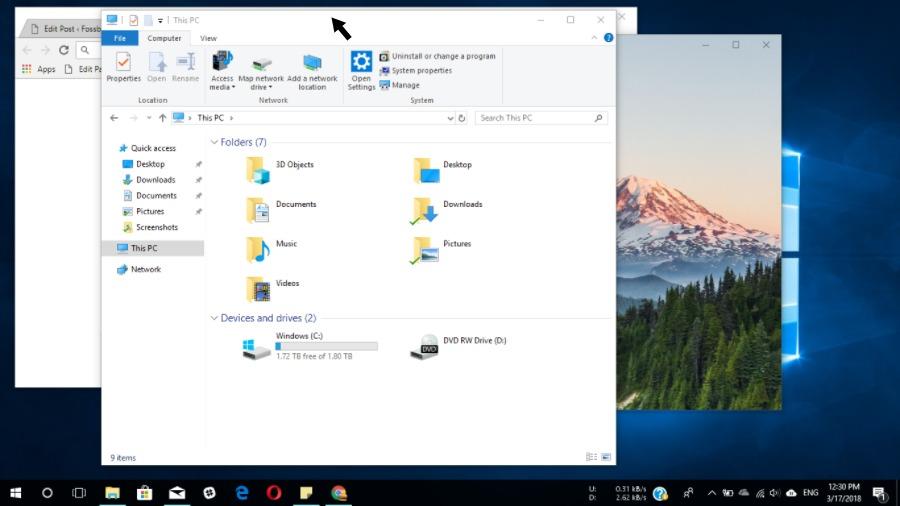
8. Open a new instance or window of an app
There are more you can do with your mouse in Windows 10. When you’re running a web browser and want to open a new browser window, you can simply do it by clicking its taskbar icon with the scroll wheel of your mouse.
If you don’t have a mouse, you can do the same by pressing the Shift key and click the app’s icon in the taskbar.
Similarly, you can open a new instance of an app in Windows 10 (if the app supports it). For instance, you can open another File Explorer window.
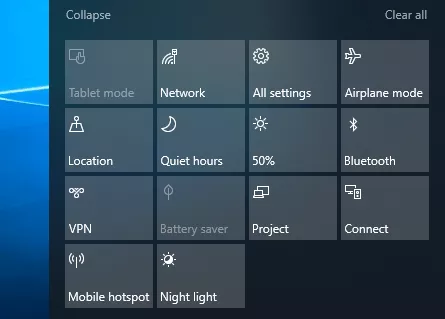
9. Use Action Center to toggle quick settings
If you’re using Windows 10 for a long time, then you might be familiar with the quick actions of the Action Center. These options let you quickly turn on and off Bluetooth, WiFi, and many other Windows features. Otherwise, digging deep through the Settings app would consume a lot of your time.
You can rearrange the quick actions by visiting Settings > System > Notifications & actions. For more interesting stuff, read our detailed post on Action Center.
10. Highly useful Windows keyboard shortcuts for multitasking
For years, keyboard shortcuts have been the most basic aspect of Windows 10 multitasking. For instance, you can create custom keyboard shortcuts to open your favorite apps quickly.
Refer the following list of keyboard shortcuts to perform different tasks such as minimizing and quickly jumping between apps on your desktop:
| Keyboard Shortcut | Description |
|---|---|
| Windows Key or CTRL + Esc | Opens Start Menu. |
| Windows + A | Opens Actions Center. |
| Windows + E | Opens File Explorer. |
| Windows + D | Show or hide the desktop. |
| Windows + I | Opens Settings app. |
| Windows + L | Lock PC. |
| Windows + S | Opens Windows Search. |
| CTRL + SHIFT + Esc | Opens Task Manager. |
| Windows + Down Arrow | “Make an active window a floating window. While holding the Win key, press Down again to minimize it.” |
| Windows + Up Arrow | Maximize a minimized active window. |
| Windows + Tab | Opens Task View. |
| Windows + Home | Minimize all non-active windows. |
So, there were some Windows 10 multitasking tips and tricks you can use to increase your work efficiency. If you find any suggestions to make, please drop them in the comments.
No comments:
Post a Comment